Sunday, October 23, 2011

Why I love DIY

I was browsing  online today, creating a Christmas wish list, when I came across this table from West Elm


It is going for $200!  I made my tree stump table for free - the wood was free and I had the rest of the supplies on hand.  This is why I love DIY projects, I saved myself $200!  

Wednesday, October 19, 2011

Tree Stump Table

When Dan came home with a truckload of wood, ready to be chopped up in to firewood, he couldn't get out his chainsaw and axe fast enough.  I, on the other hand, made sure he didn't touch any of the big stumps because I wanted one. Went a little something like this:

Dan: Look at all of this firewood, where's my axe? I don't have an axe - I need to go get an axe!
Brittney: don't touch the big pieces, I want one of those
Dan: This is a man's job, you aren't chopping wood, especially not a big piece
Brittney: I want to make a table
Dan: You want what?
Brittney: to make a table
Dan: I need an axe...chopping wood makes me feel manly....a table? really?
Brittney: set aside all the big stumps so I can pick my table
Dan: *chop, chop, chop* gosh I'm manly, I should be a lumber jack
Brittney: I want this stump for my table, don't chop this stump
Dan: I'm such a man
Brittney: will you move this stump to the front of the garage?
Dan: I'm so manly, of course I will, it's what manly men do
Brittney: Thanks, you're so manly. 

Ever want to get your husband to do something faster?  Tell them how manly it is ;) 

Back to the table...here is the play by play.

1. It started out as a normal tree stump, bark and all.  After you determine the height that you need your table and find the correct tree stump - the first step in the process is to allow the stump to dry out completely.  It sat in our garage for about 2 months, before I went to work on it, giving it plenty of time to dry out. 

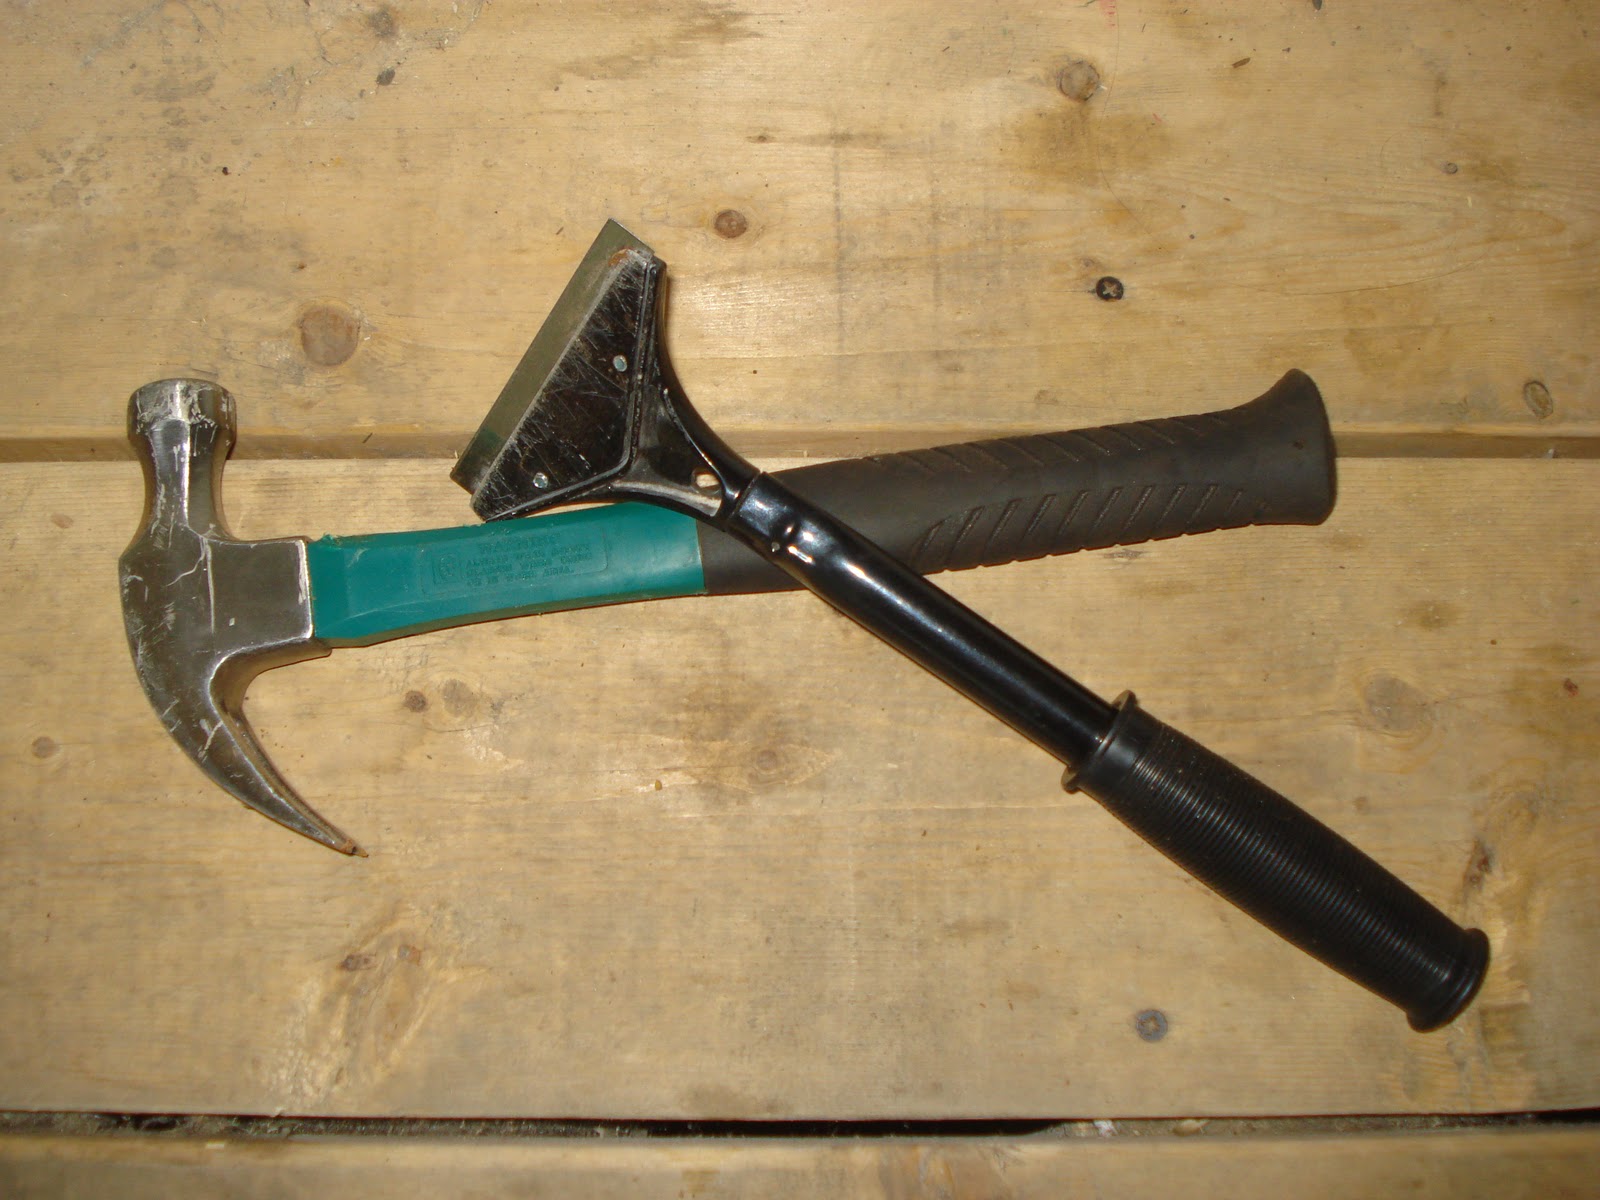
2. Remove the bark from the stump.  My manly husband wanted to use his axe on this step, using an axe is really manly, after all :)

3. Convince manly husband that an axe is not needed for this step, smaller tools will do just fine.  Continue to remove all of the bark from the stump.
Supervisor Paige agrees- the claw of a hammer works perfectly


4. (I forgot to take a picture of this step) Once all the bark is removed, using a medium and fine grit sandpaper, sand the entire stump until it is completely smooth. You should be able to run your hand over the surface and not feel any roughness or hairs.

5. Make sure the stump is level.  My stump wasn't completely level, so my manly man of a husband used his grinder to grind it down and level it.  
(apparently manly men wear socks with sandals ;) )

After it was level, I continued to sand the top to make sure it was completely smooth as well.


6. Wipe down the stump to remove all dust and dirt.  I used tack cloth, but you could use a damp rag as well. 

7. Apply the polyurethane.  I used a semi-gloss finish to give it a little gloss, but you can use whatever finish you desire.  I followed the directions on the polyurethane can for drying times and also gave the stump a light sanding between coats.   I applied 6 coats of polyurethane to the top of the table and 4 coats to the sides. 

8.  Bring the table inside and enjoy the looks of a natural element in your home


While I'm enjoying the natural elements this table brings to our bedroom, Dan continues to search online for more free firewood - nothing says man like chopping wood. If some day, he decides he doesn't want to be a salesman anymore, he aspires to be a lumberjack. 

Monday, October 17, 2011

More Stripes

I love stripes, as you can see here, here and here.  So when our basement TV wall was looking awfully empty and I was looking to spruce it up a budget, I decided to turn to what else than some stripes!

Here is what the basement looked like after installing the new carpet, painting the walls & trim and moving our furniture down there. 


 (yes, I often take photos without cleaning up at all)

In previous rooms, I had fabric hangings on both sides of the TV.  But, I wasn't feeling it for the basement for more than one reason 1) the ceilings are lower and the hangings make them look even lower 2) there are outlets/light switches in the way 3) I was growing tired of looking at them.  


Because the ceilings are low, that limited what could be hung around the TV so the wall didn't appear to be an empty wall with just a TV.  Enter the idea of stripes! 


It gives the wall enough visual interest that it doesn't appear empty and boring.  But, it isn't overwhelming to look at, either.  
The process was pretty simple.

First, measure the total height of the wall and decide how many stripes you want to determine how thick each stripe will be.  Then I simply measured and marked with pencil, where each stripe would be.


I chose to draw the entire line, because it was my first time painting wall stripes.  Next time, I'd just leave tick marks and let my eye make the taping line straight.  

After the lines are penciled on, tape off the stripes.  

Once the tape is on, using the same color that the wall currently is, paint over the edge of the tape where the stripe will go.  This creates a seal between the tape and wall, so if any color leaks, it is the base wall color.  

Once that paint is dry, paint the stripes.  It took two coats of the stripe color to get even coverage.  After the 2nd coat, when the paint is still wet, remove the tape to reveal your crisp and clean stripes.


Since I was already working on the basement a bit, I went ahead and added some curtains and wall art (things we already had).  It's amazing what a few things on the walls and some curtains can do.  Even though the room is far from complete, it took the room from feeling barely started to nice and cozy/homey.  


Tuesday, October 4, 2011

Two Tone Dresser

Dan still has his childhood dressers, they are in great shape structurally, but they had a few nicks and scratches.  Usually I am the initiator of projects around the house, but this project Dan started on before I even knew he was thinking about it!  And that's the reason I don't have any good "before" pictures of the dresser.  Here is what I do have:

the dresser after the sanding started:


Dan's initial thoughts were to sand the dresser down to the natural wood and re-stain it a darker color, but unfortunately he got crazy with the sander and sanded too deep in a couple spots, removing the natural grains. 
The solution?

A two tone painted dresser!


For the top, I used the same glazing technique I used on the bathroom cabinets.   Three coats of glaze and I had the perfect deep dark wood.  The rest of the dresser was painted white.  The whole piece was finished off with three coats of polyurethane for added protection.  

The last step was adding new hardware, we picked an oil rubbed bronze handle because it goes so nicely with the dark wood on the top.  


For now, the dresser is sitting in our upstairs living room.  This room isn't even near complete, and this probably isn't the permanent home for this dresser, but it works for now!


Like my pretty new chairs and rug?  The chairs were an anniversary gift from the hubs (yup, my husband bought my anniversary gift on craigslist!) and the rug was also a part anniversary gift from my parents! 

As for the accessories on top of the dresser, the mirror was a steal at TJ Maxx and the rest of the items were things I had around the house not being used - I love decorating from my own "store" in the basement!